

In the world of e-commerce, having a reliable accounting software like Plugbooks can streamline your financial management and provide valuable insights. Plugbooks offers an easy-to-use platform that integrates with major e-commerce and bookkeeping systems.
Getting started with Plugbooks is simple and straightforward. In this blog, we’ll walk you through the process of creating an account on Plugbooks, so you can begin managing your finances efficiently.
Step 1: Get Started and Choose How to Start Your Account
To begin creating your account on Plugbooks, follow these steps:
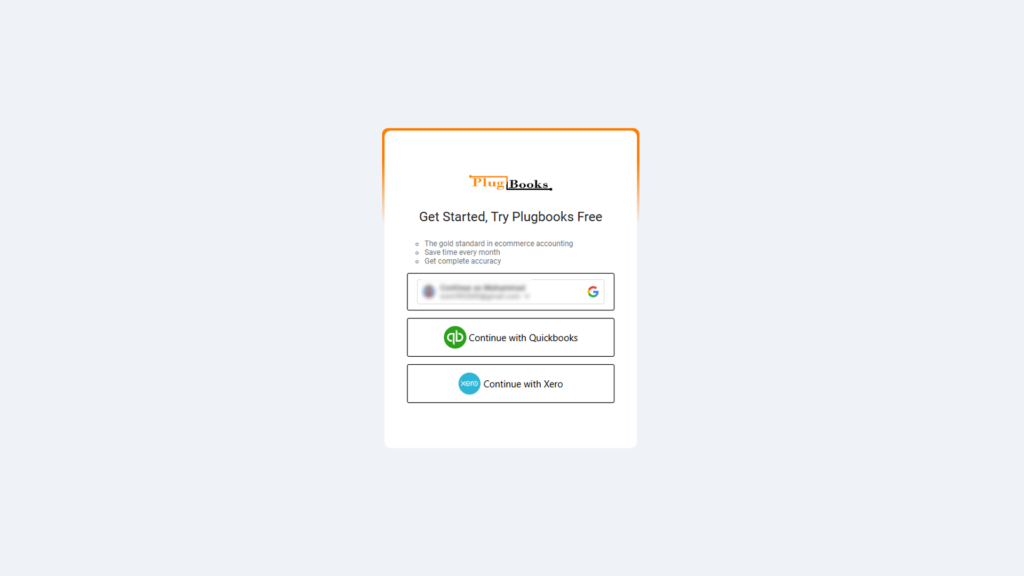
Visit the Plugbooks website at plugbooks.io and click the Get Started button on the homepage.
Once you’ve clicked “Get Started,” you’ll be presented with the following sign-in options:
- Google: Sign in with your Google account.
- QuickBooks: Sign in with your QuickBooks account.
- Xero: Sign in with your Xero account.
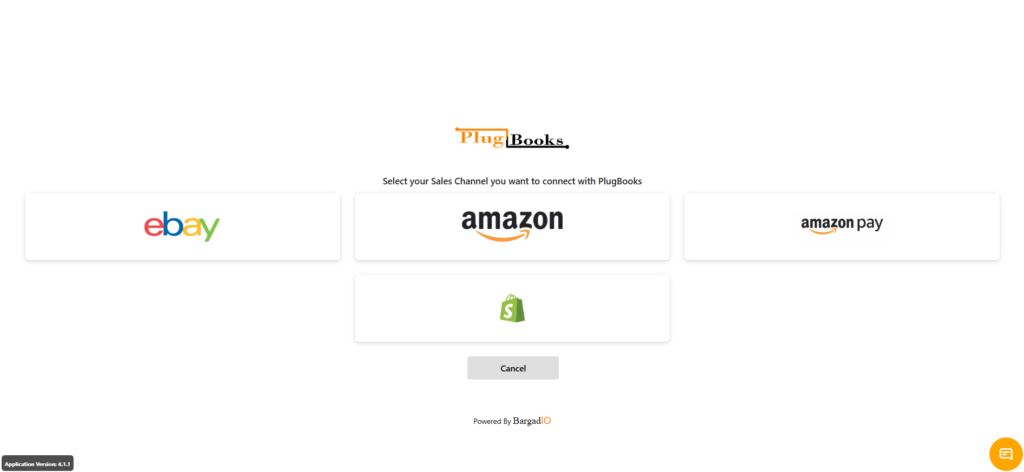
Step 2: Select Your Sales Channel
After signing in, the next step is to choose your sales channel. PlugBooks supports multiple platforms for seamless financial management. You can connect to any of the following:
- Amazon
- eBay
- Amazon Pay
- Shopify
Select the platforms relevant to your business. This integration helps automate sales data import and streamlines your accounting process. Need help choosing a channel? Visit our FAQs section for common questions and answers.
Step 3: Amazon Channel Setup
Once you select Amazon, fill in the following details:
- Name: Enter your Amazon store name.
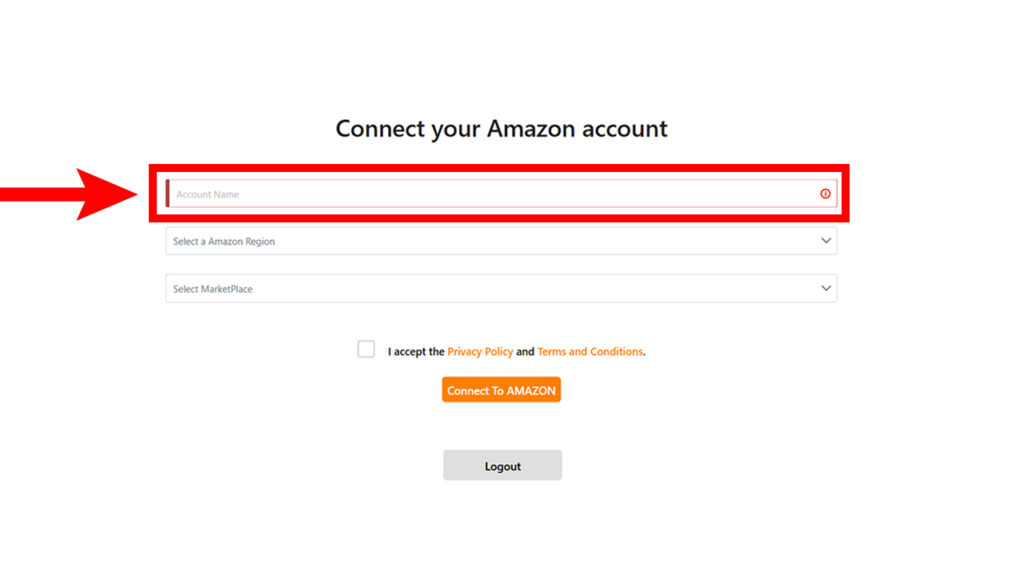
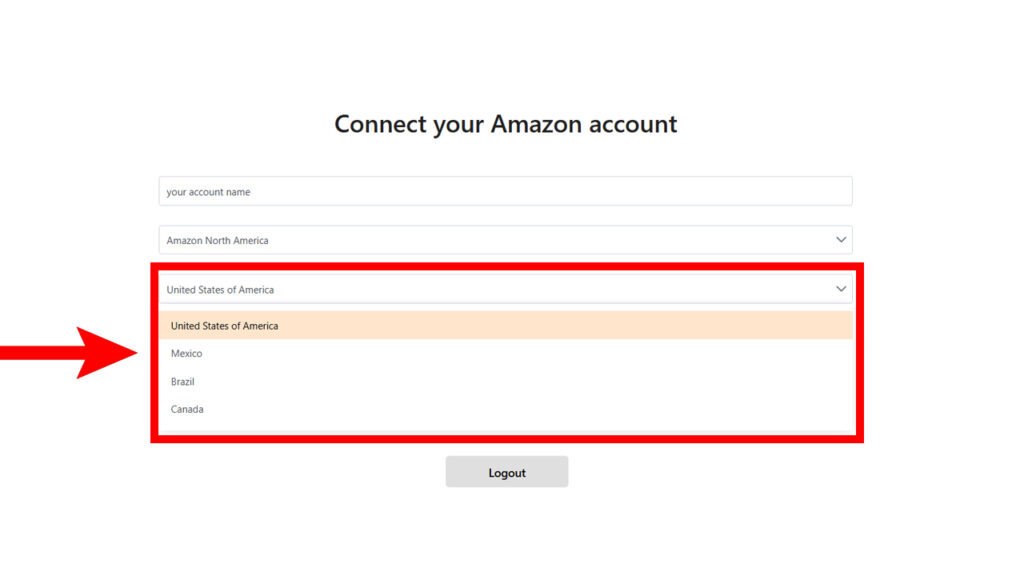
- Region: Select North America or Europe from the dropdown menu, depending on your store’s location.
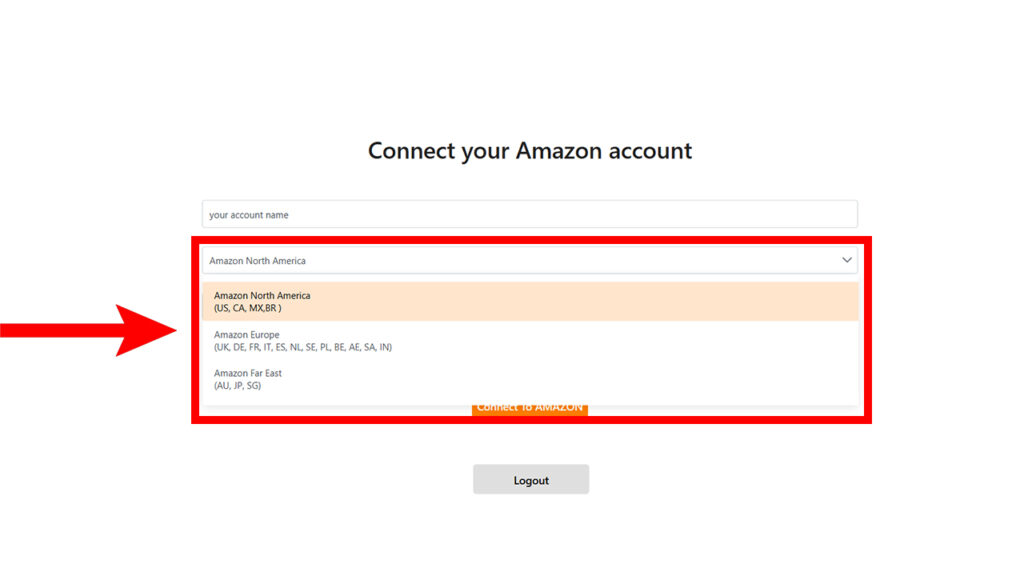
- Marketplace: Choose from the US, Canada, Mexico, or Brazil.
Then follow these steps:
1. Click Connect after entering the details.
2. Tick the checkbox: “I accept the Privacy Policy and Terms and Conditions.”
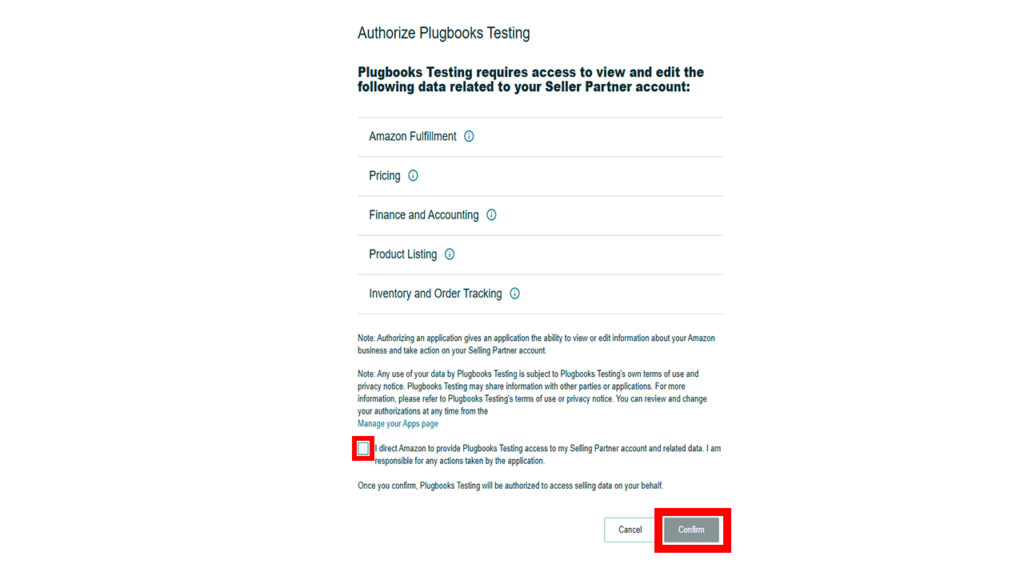
3. Once you complete this step, your Plugbooks account will be successfully created, and you will be redirected to your dashboard to start managing your settlements with ease.
📞 Contact Us
Still need help? Our support team is here for you. Contact us via email support@plugbooks.io or chat for personalized assistance.
Conclusion
With your sales channels and bookkeeping system connected, PlugBooks will now begin automating your sales and financial data. You’re all set to simplify accounting and focus more on growing your business.
2 thoughts on “How to Create an Account on Plugbooks: A Step-by-Step Guide”