

Send COGS Bills to Xero or QuickBooks easily with PlugBooks to keep your bookkeeping accurate and efficient. Managing your Cost of Goods Sold (COGS) is vital for tracking real profits and maintaining organized financial records.
With PlugBooks, you can Send COGS Bills either manually or automatically, ensuring that every product cost is correctly recorded and synced with your accounting software.
Let’s walk through both methods step by step so you can choose the process that best fits your workflow and keep your accounts up to date effortlessly.
Method 1: Manually Sending COGS Bills
In the manual method, you have the option to either send the COGS bill by itself or along with your settlement. Here’s how to do it:
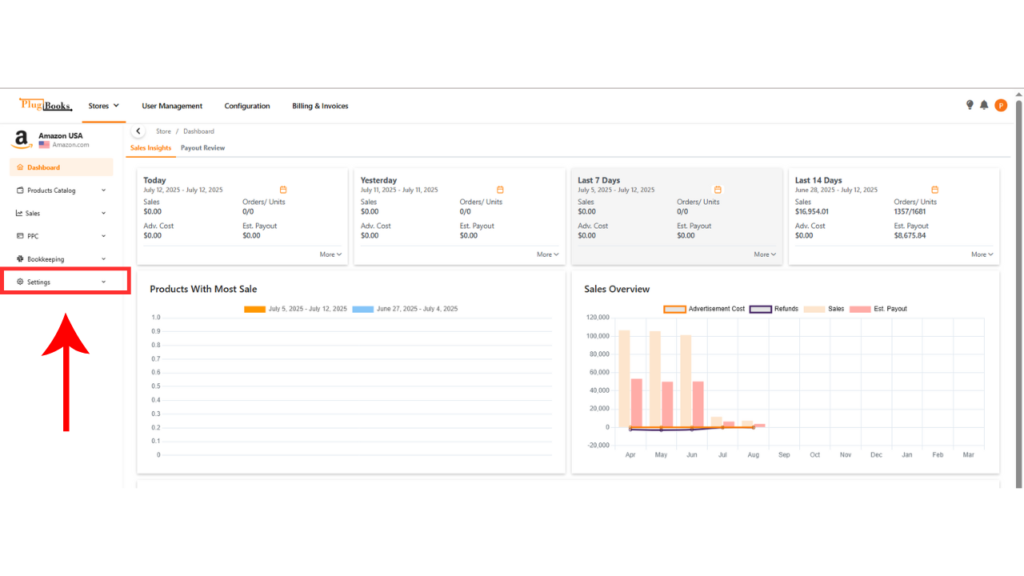
Step 1: Access your Plugbooks dashboard
First, log in to your Plugbooks account using your credentials.
Step 2: Go to the Settings section
Once logged in, look for the Settings menu button on the left-hand sidebar. Click on it to expand the sub-menu.
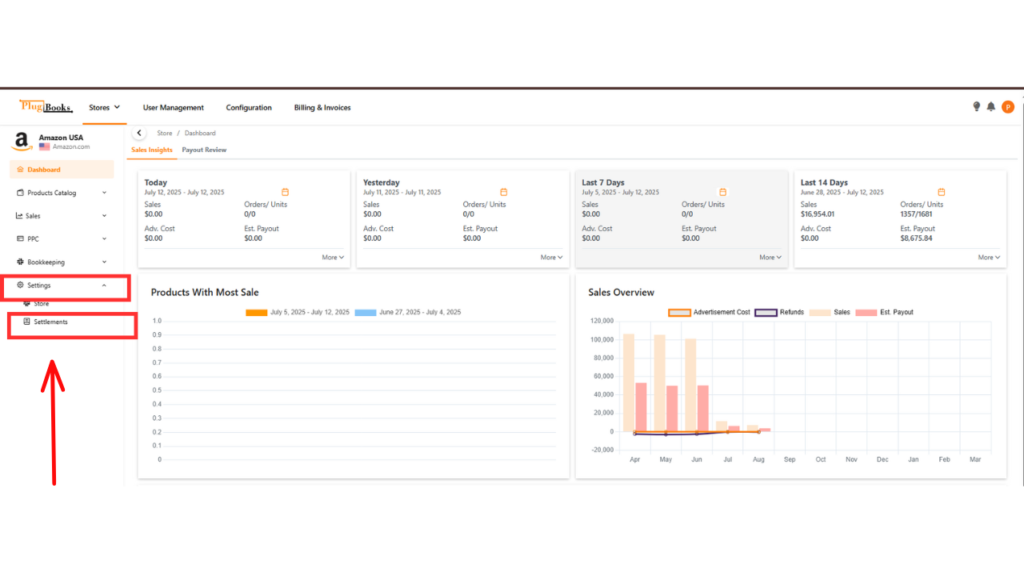
Step 3: Open the Settlements section
- In the sub-menu, locate the Settlements button.
- Click on Settlements to open a new page with multiple tabs.
If you want to learn how to add indirect expenses to a settlement, click here for the detailed guide.
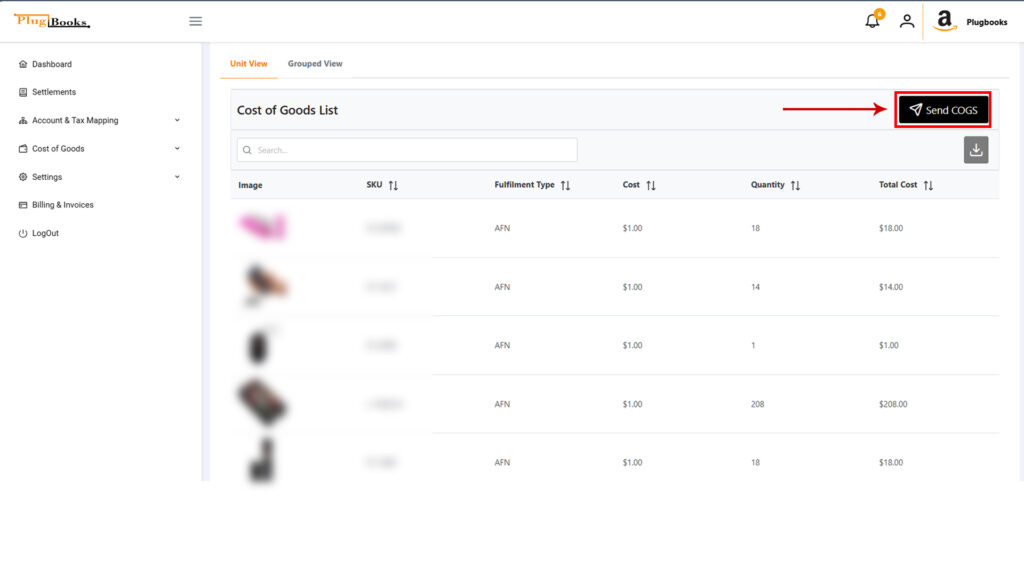
Step 4: Go to the Cost of Goods Tab
On the Settlements page, navigate to the Cost of Goods tab. Here, you will see a switch button labeled Turn On COGS.
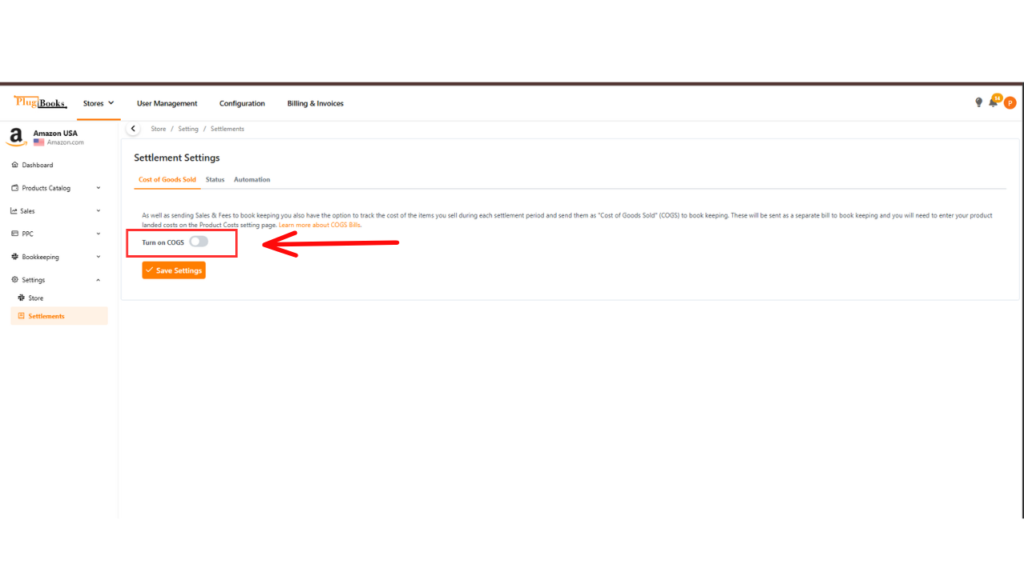
Step 5: Customize the COGS settings as needed
- Turn on the COGS option.
- Once enabled, the system will display the Cost of Goods Sold mapping from your chart of accounts.
- You can manually select the credit account and debit account.
- Alternatively, you can leave them as default — Plugbooks will automatically create the necessary accounts.
- These accounts will appear in the dropdown menus for selection.
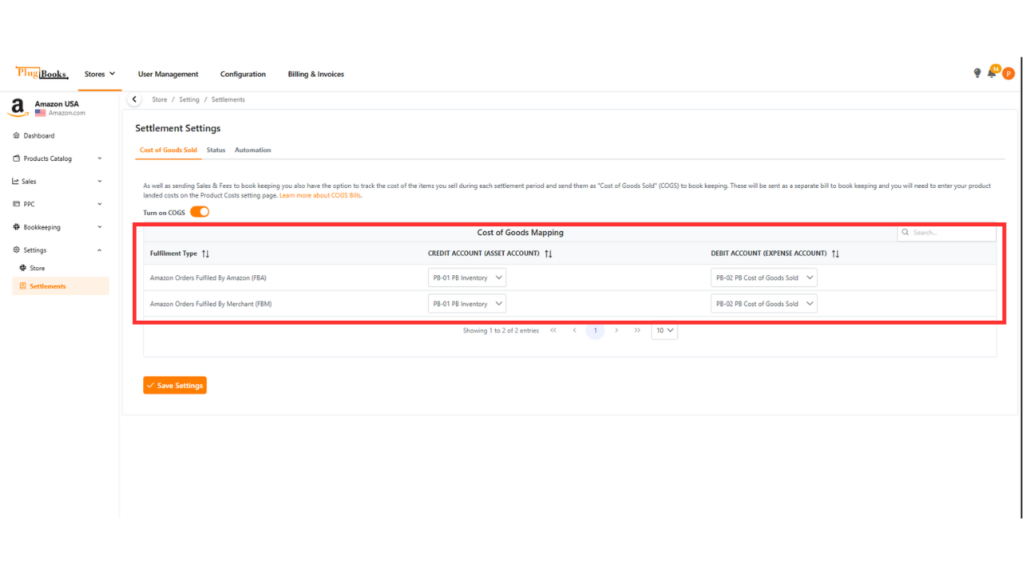
Once you’ve selected or confirmed the accounts, click Save Settings.
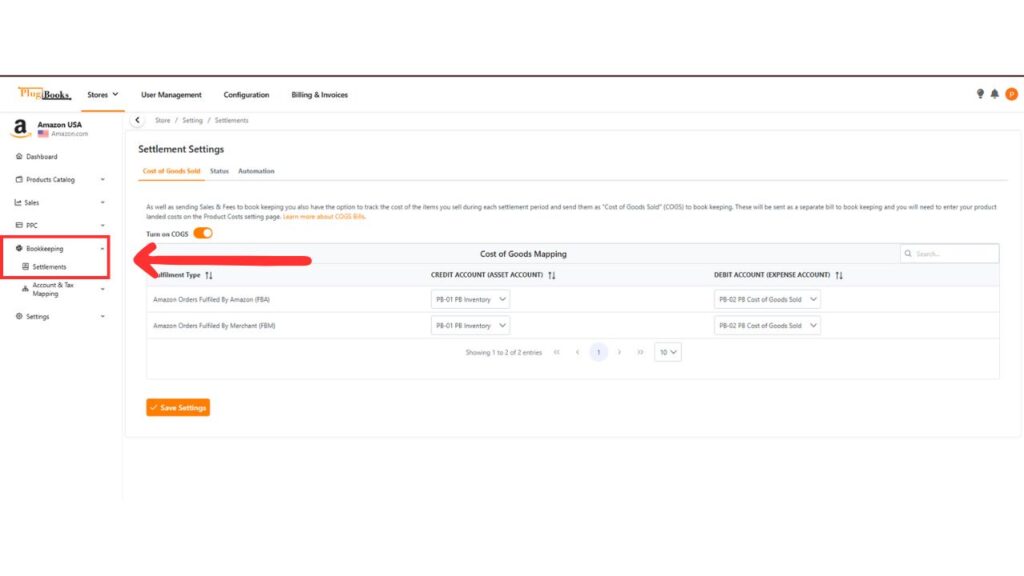
Step 6: Access Bookkeeping
Click Bookkeeping from the sidebar menu to proceed.

Step 7: Open Settlements
Click Settlements under the Bookkeeping menu to view your settlements.
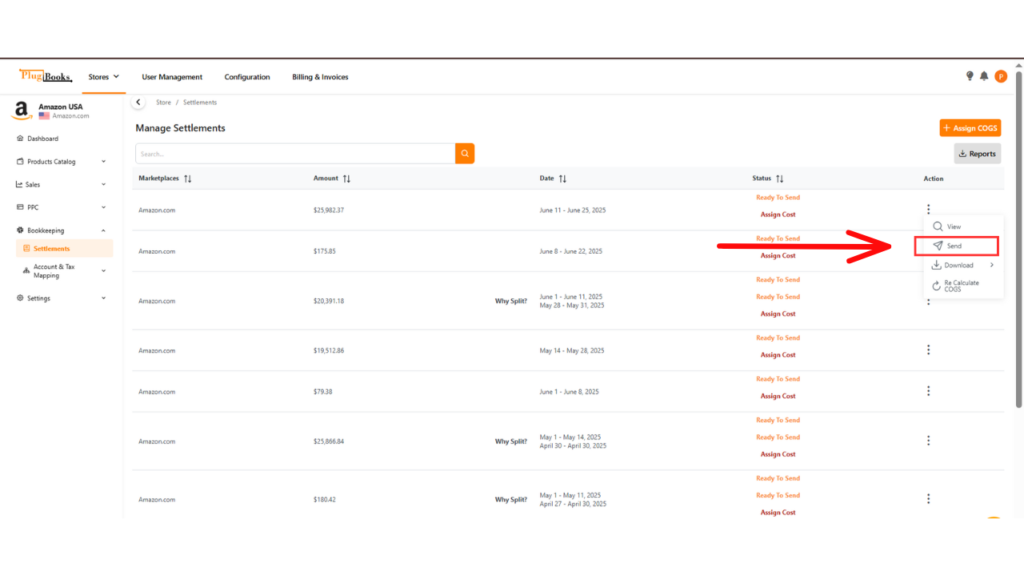
Step 8: Submit COGS directly from the Settlement page
- Now that your settings are configured, go to the Settlement Actions section.
- You can send your COGS along with your settlement from there.
- If you’ve already assigned cost to the settlement, sending the settlement will automatically include the COGS bill.
Need help assigning cost to settlements? Check out our How to Assign Cost to Settlement blog for a detailed guide.
Step 9: Submit Only the COGS Entry
If you only want to send a COGS bill without sending the entire settlement, follow these steps:
- Double-click on the settlement or view it from the Actions menu.
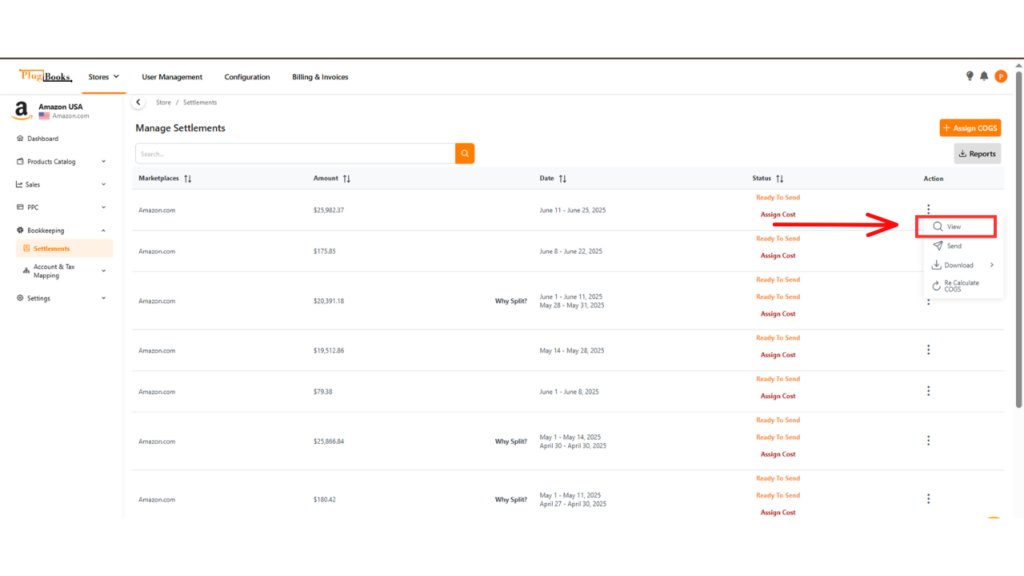
- Once inside the detailed view of the settlement, go to the Analysis and COGS tab.
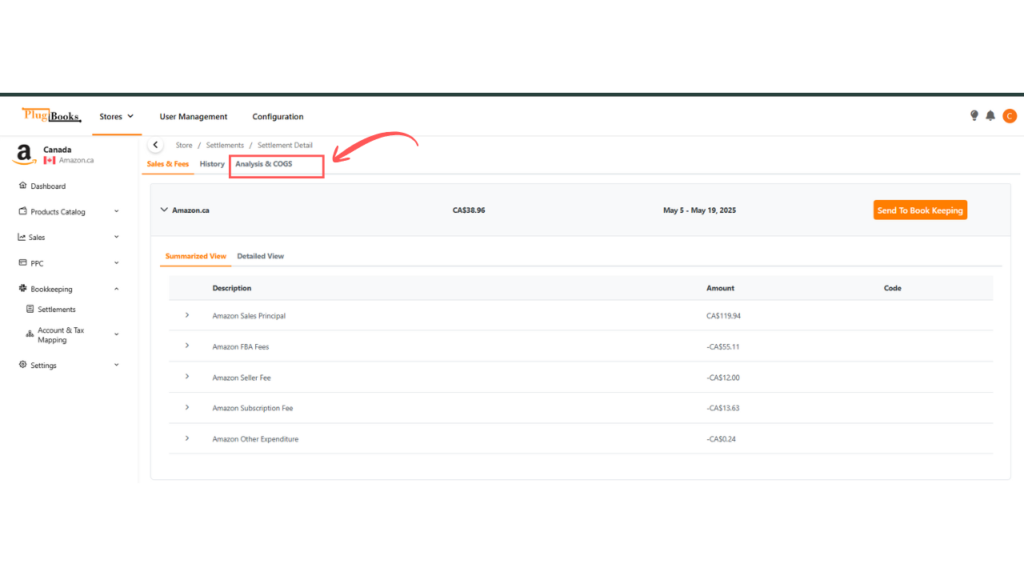
- Scroll down to find the COGS section below the Analysis section.
- Here, you’ll see the Send COGS button. Clicking this will send the COGS bill only, without the settlement.
Method 2: Automatically Sending COGS Bills
If you prefer automation, Plugbooks allows you to automatically send COGS bills along with settlements. For more information on the auto-send feature, visit our detailed Auto Send Settlements Blog.
Here’s how to set up automatic COGS bill sending:
Step 1: Turn On the Auto-Send Feature
Just like in the manual method, you need to enable the COGS switch from the Cost of Goods tab. Once this is turned on, COGS bills will automatically be sent with every settlement, saving you the manual steps.
Conclusion
Whether you choose the manual method or prefer automation, PlugBooks makes it easy to Send COGS Bills to your bookkeeping system quickly and accurately. With both options available, you can customize the process to suit your workflow, ensuring your financial records remain organized and always up to date.
For additional help or questions, reach out to PlugBooks Support or explore more step-by-step resources in our Help Center to keep your accounting seamless.