

Connecting Amazon Pay to Plugbooks is a simple process that allows you to manage your payments and accounting seamlessly. Whether you’re an existing Plugbooks user or setting it up for the first time, this guide will walk you through the steps to connect Amazon Pay.
Unlike other sales channels, Amazon Pay requires specific credentials that you’ll need to obtain from your Amazon Pay account.
Scenario 1: For Existing Plugbooks Users
If you are already using Plugbooks, you can easily add Amazon Pay as a new sales channel. Follow these steps:
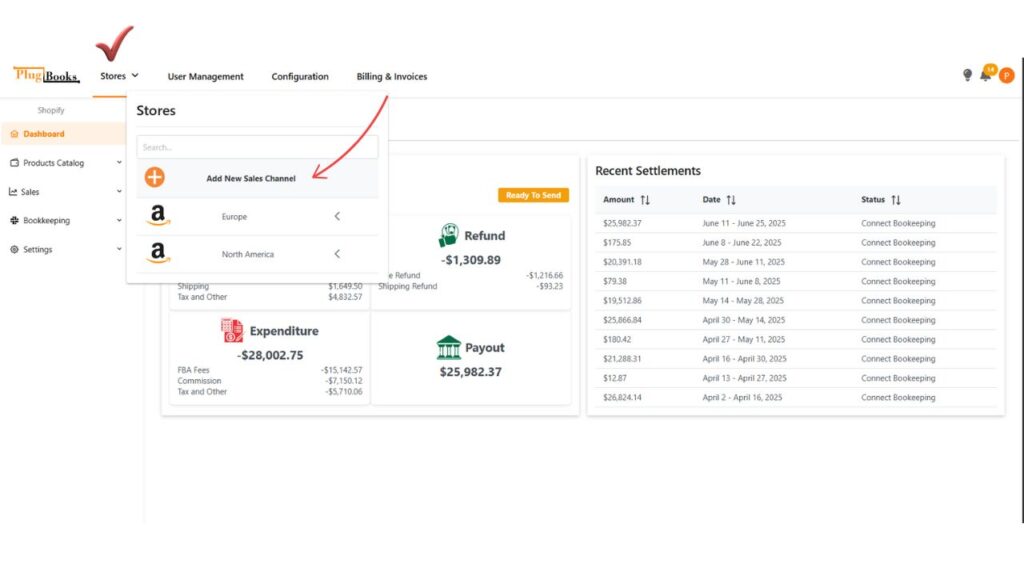
Step 1: Add a New Sales Channel
- Log in to your Plugbooks account.
- Click on the dropdown in the top-left corner where your current store is listed.
- Select “Add New Sales Channel” from the dropdown menu.
For more details on how to add new stores in Plugbooks, refer to this guide.
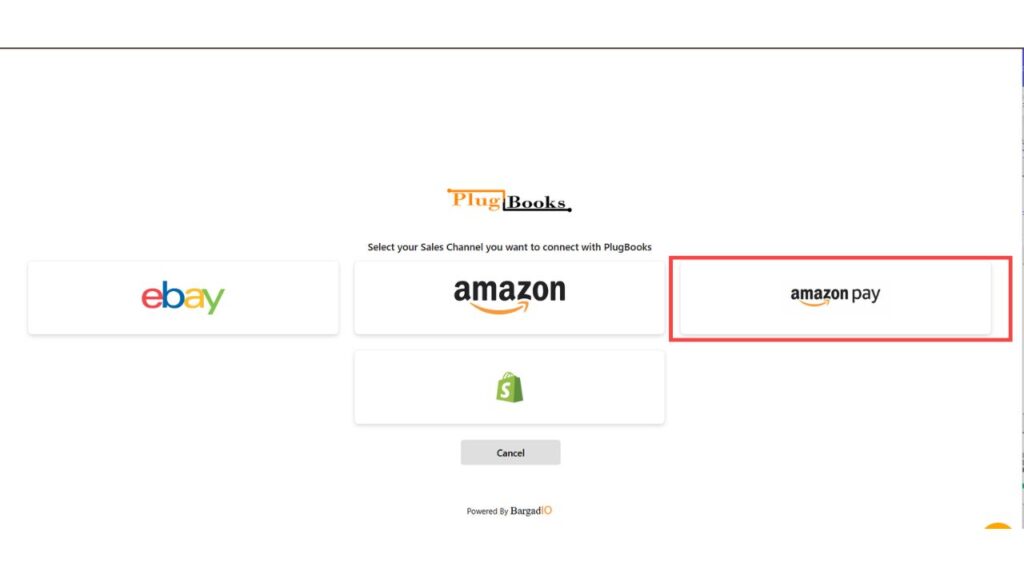
Step 2: Select Amazon Pay
- From the list of available sales channels, choose Amazon Pay.
Generate Your Amazon Pay Keys and Enter Credentials
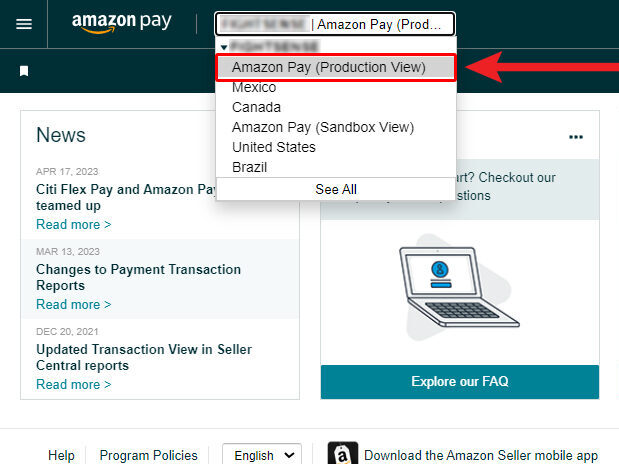
- Go to Amazon Pay Integration Central (US region portal).
- Use the Marketplace Switcher to select Production.
- Access Integration Central: Click on “Integration Central” in the side-menu.
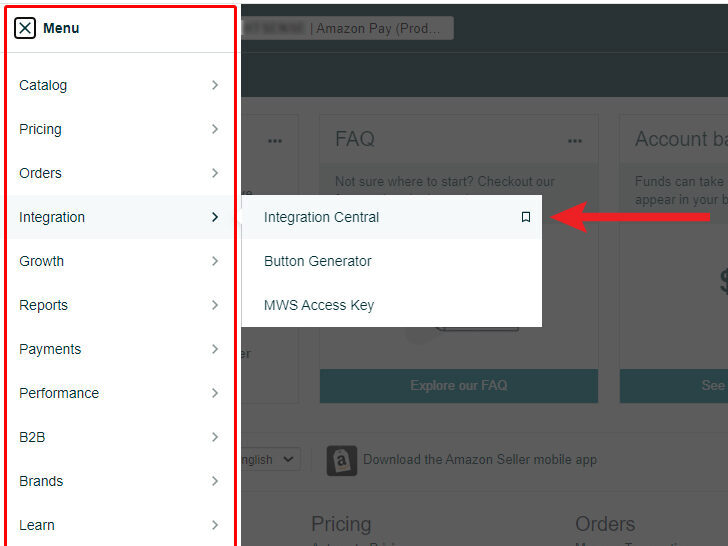
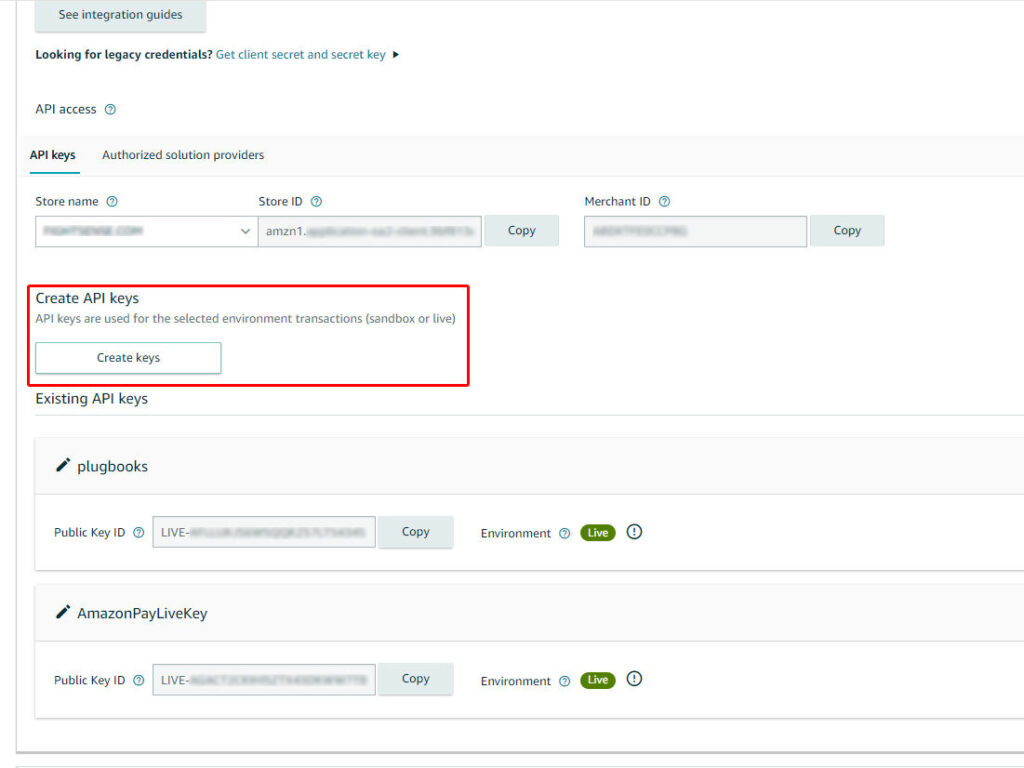
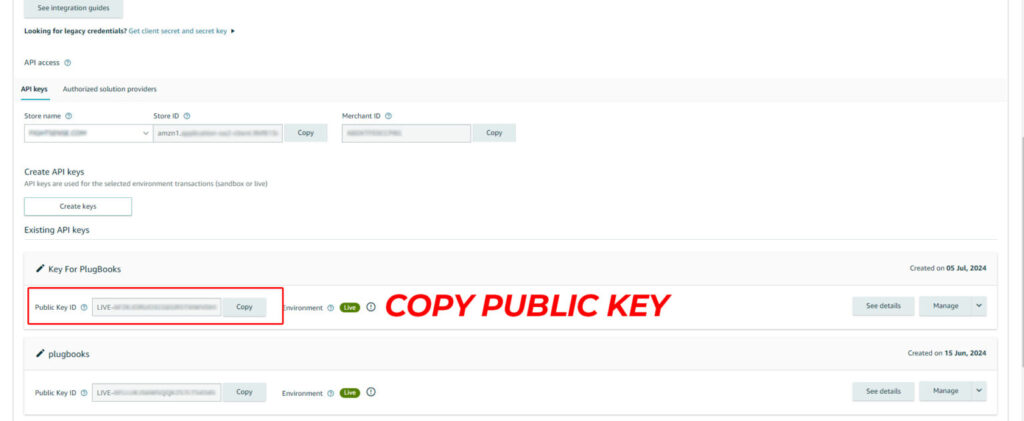
- Navigate to the API Keys section.
- Click “Create Keys” to generate your public and private keys.
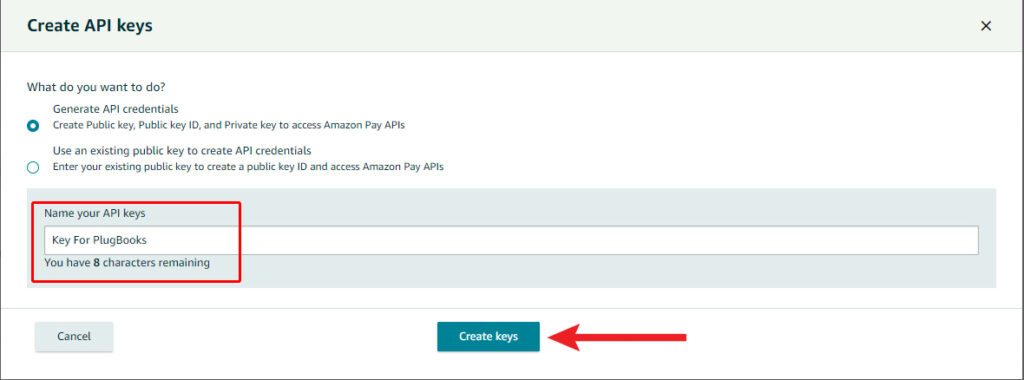
- Select “Generate API credentials” and name your keys.
- Click “Create Keys” to generate the key pair.
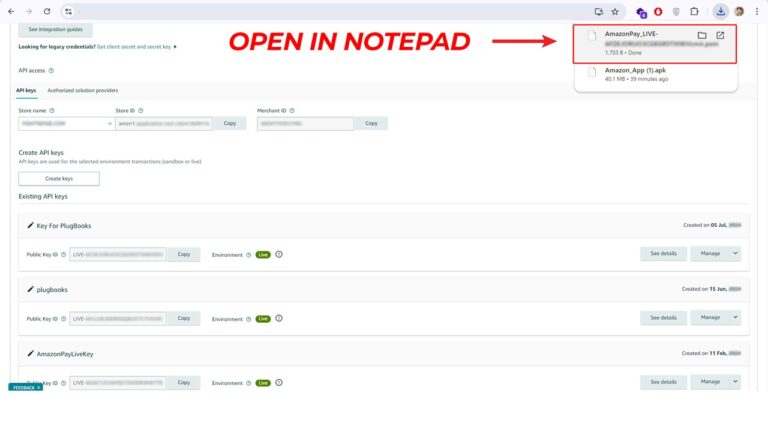
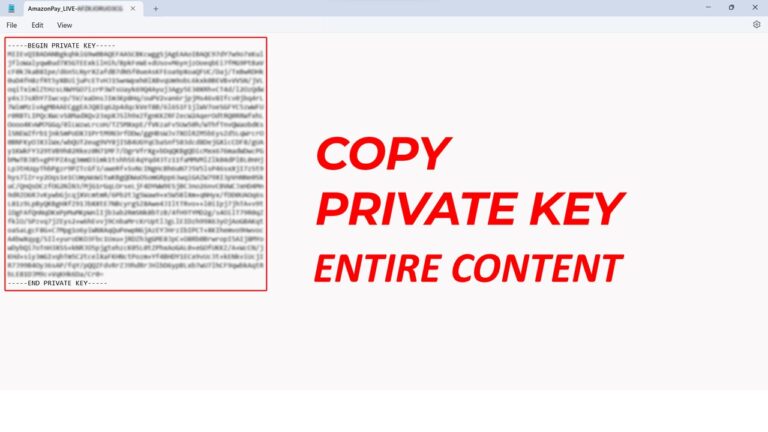
- Download the private key file, open it in a text editor, and copy the full content.
- You will be directed to the setup page.
- Provide your Amazon Pay credentials to proceed.
Scenario 2: For New Plugbooks Users
If you’re new to Plugbooks, you’ll need to create an account before you can connect your Amazon Pay account. Follow the steps outlined in this Create an Account on Plugbooks guide.
Once registered, continue with the steps below.
From Step 3 to Step 6, the process is common for both scenarios.
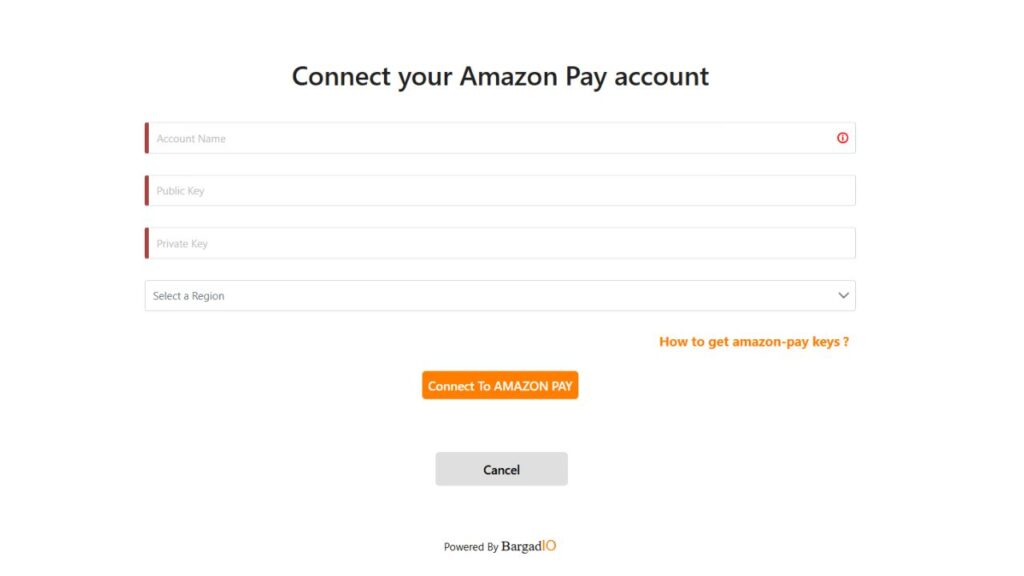
Step 3: Enter Store Name and Credentials
On the setup page, fill in the following details:
- Store Name: Enter the name you wish to assign to your Amazon Pay store.
- Public Key: Obtain this from your Amazon Pay account.
- Private Key: Also retrieved from your Amazon Pay account.
For help obtaining your Amazon Pay credentials, visit this guide.
Step 4: Connect Amazon Pay
After filling in the required inputs (store name, public key, and private key), click “Connect to Amazon Pay”. Once this is done, Plugbooks will securely integrate with your Amazon Pay account.
Step 5: Account Setup Complete
Your account has been successfully created. You can now proceed to your dashboard and start using your account.
Step 6: Start Managing Amazon Pay with Plugbooks
Once connected, you can start managing your Amazon Pay transactions and accounting seamlessly through Plugbooks. The platform will automatically sync your payment data, giving you a smooth and efficient workflow.
Conclusion
Whether you’re new to Plugbooks or an existing user, connecting Amazon Pay is a straightforward process. By providing your credentials and following a few simple steps, you can integrate Amazon Pay with your bookkeeping and enjoy automated accounting with QuickBooks or Xero.