

Keeping your financial data synced between Plugbooks and your bookkeeping software, like Xero or QuickBooks, is essential for accurate accounting. If your bookkeeping connection gets disrupted, Reconnect Bookkeeping Software is a straightforward process.
Here’s a simple step-by-step guide to help you restore the connection between Plugbooks and your bookkeeping software:
Step 1: Log Into Your Plugbooks Dashboard
Start by logging into your Plugbooks account with your credentials. Make sure you have the required permissions to modify store and bookkeeping settings.
Step 2: Pick the Store You Want to Reconnect
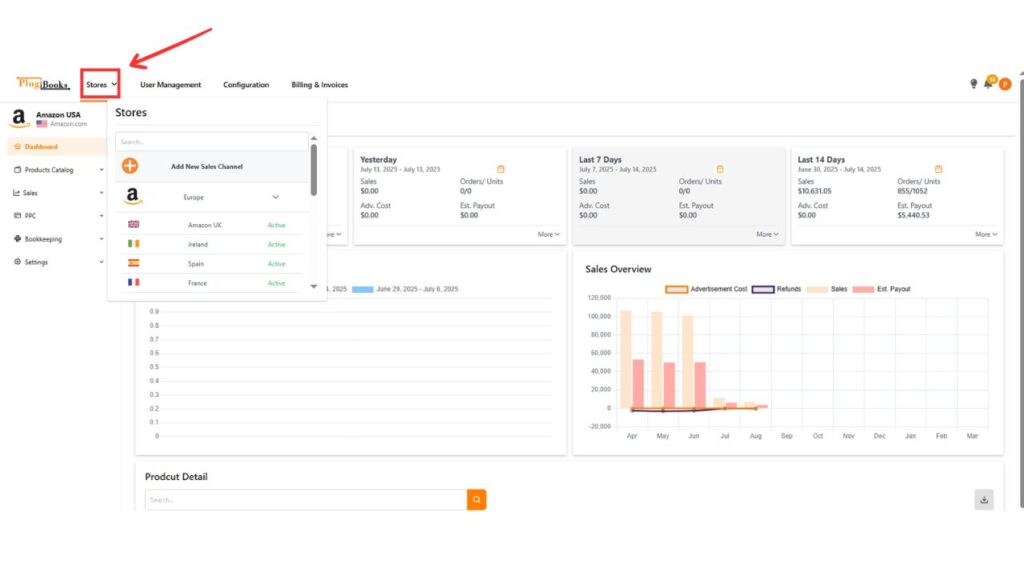
Once logged in, head over to your Dashboard.
Locate and select the specific store that’s connected to the bookkeeping software you wish to reconnect.
The image below visually guides you through this step — showing exactly where to find and select your store within the PlugBooks interface.
Step 3: Go to the Settings Menu
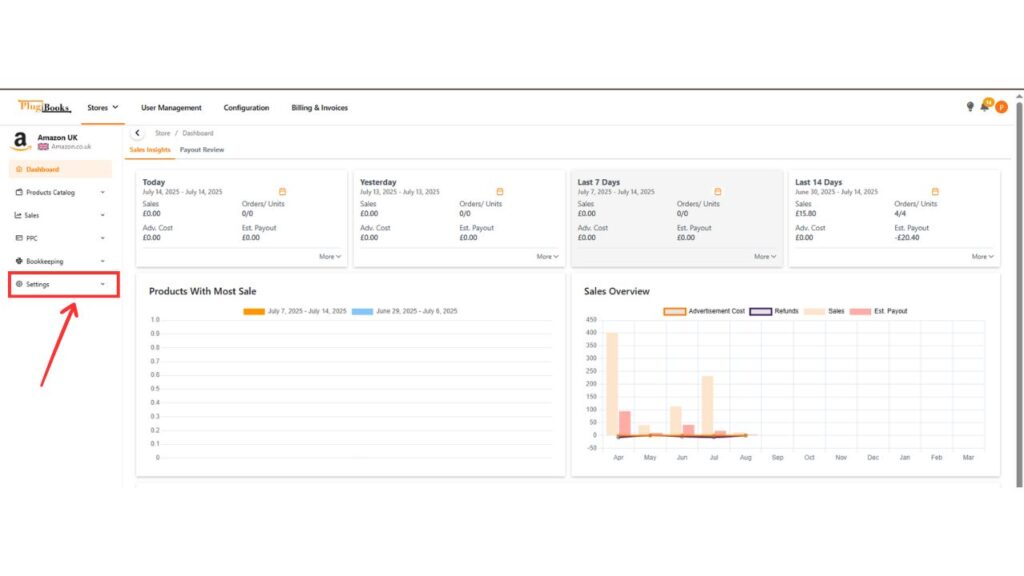
After selecting your store, navigate to the Settings menu located on the left-hand sidebar of your PlugBooks dashboard.
This section allows you to manage integrations, connection preferences, and update your bookkeeping links easily.
The image below highlights exactly where the Settings option appears—so you can follow along visually and ensure you’re in the right place before moving to the next step.
Step 4: Access the Sales Channel Info Section
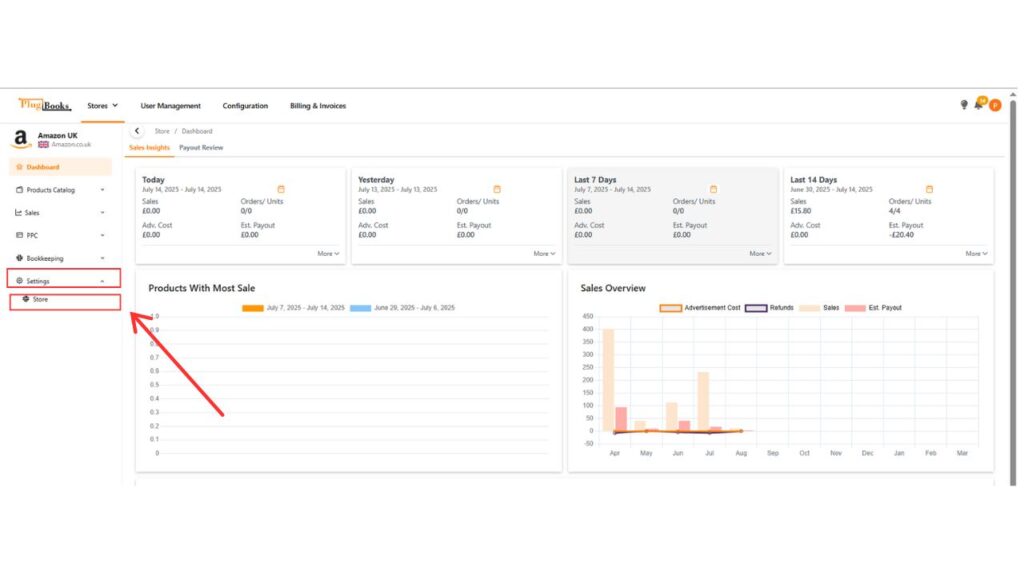
- Within the Settings menu, open the Store sub-menu.
- First, you will see the Sales Channel Info section.
- Scroll past the Sales Channel Info section.
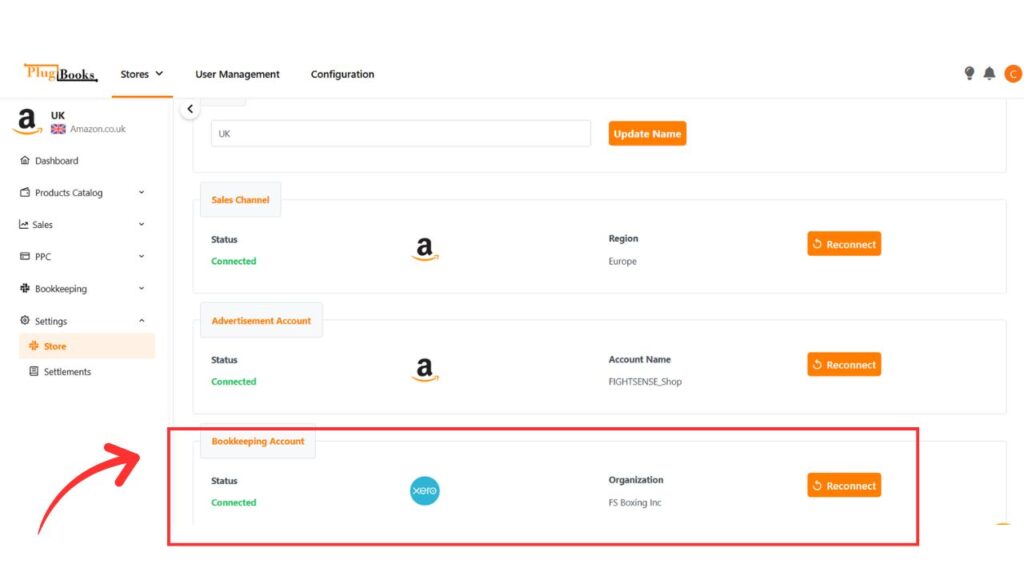
- Continue scrolling until you reach the Bookkeeping section.
Step 5: Reconnect Your Accounting Software (Xero or QuickBooks)
- In the Bookkeeping section, locate your connected bookkeeping software (e.g., Xero or QuickBooks).
- You will see a Reconnect button next to the bookkeeping software name.
- Click on the Reconnect button to start the reconnection process.
Step 6: Grant Authorization to the Bookkeeping Software
- Clicking Reconnect will prompt Plugbooks to request authorization from your bookkeeping software.
- Follow the on-screen prompts to log in to your Xero or QuickBooks account.
- Grant Plugbooks access to complete the reconnection process.
Step 7: Verify Reconnection Completion
Once the authorization process is complete, you will receive a confirmation that your bookkeeping software has been successfully reconnected. Your financial data will now resume syncing automatically with Plugbooks.
By following these steps, you can quickly and efficiently reconnect bookkeeping to Plugbooks, ensuring your financial records remain accurate and up-to-date.
For further assistance or questions, please visit our FAQs or reach out through our Contact Us page.
One thought on “Reconnect Bookkeeping Software for Seamless Plugbooks Use”