

If you’re setting up Plugbooks to sync your online store data with QuickBooks or Xero, one of the first steps is creating a private app and generating an access token.
Don’t worry—this isn’t as technical as it sounds. In this guide, we’ll walk you through the full process, step-by-step, in a friendly, non-technical way. Whether you’re connecting Shopify, Amazon, or eBay, Plugbooks makes integration seamless.
Let’s jump right in.
🛠 Step 1: Log in to Your Shopify Account
Go to Shopify and log into your dashboard using your email and password.
⚙️ Step 2: Go to the “Apps” Section
After logging in:
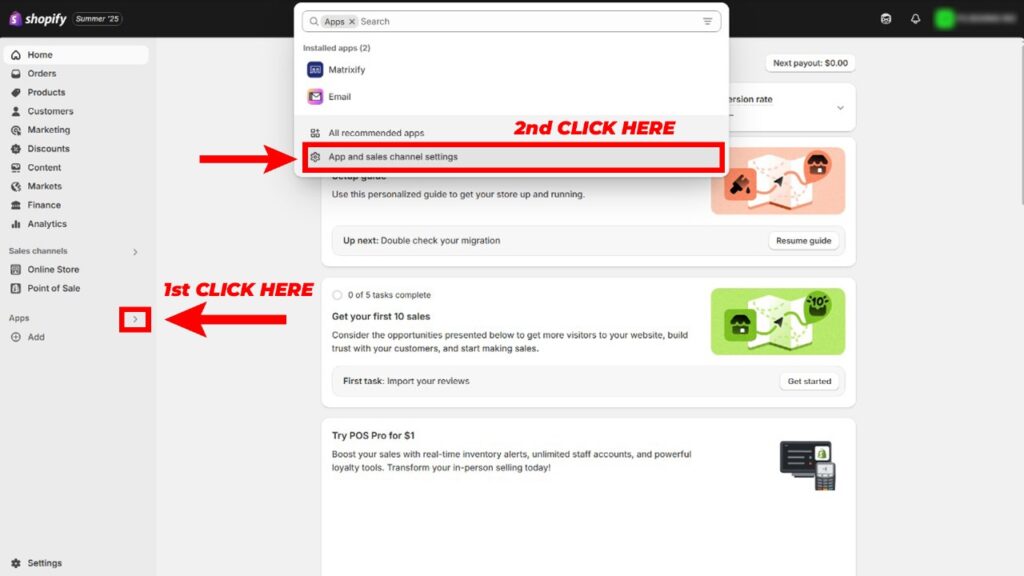
- On the left menu, click on “Apps” arrow.
- Click on “App and sales channel settings”.
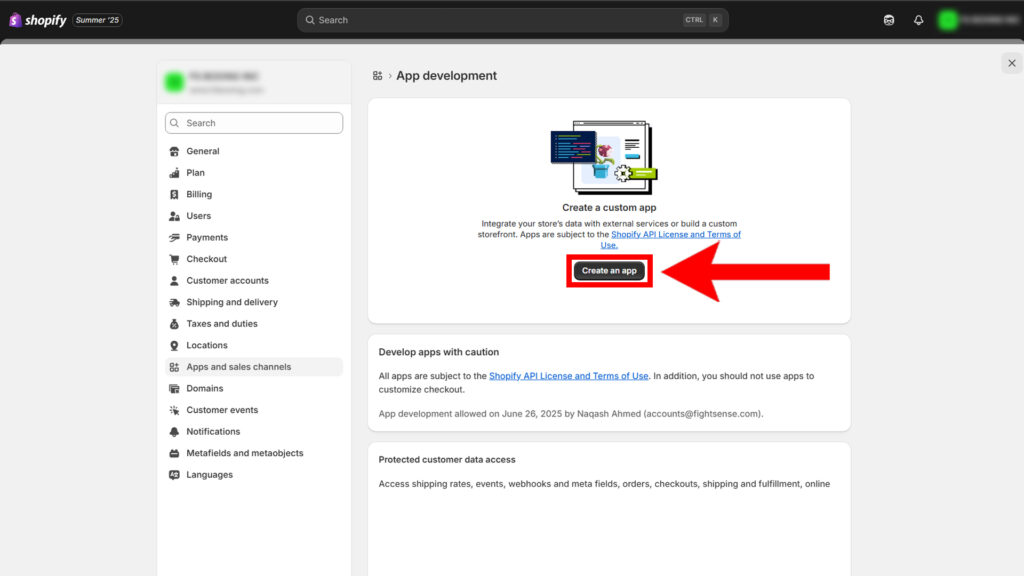
- Click “Create an App” or “Add Private App” to get started.
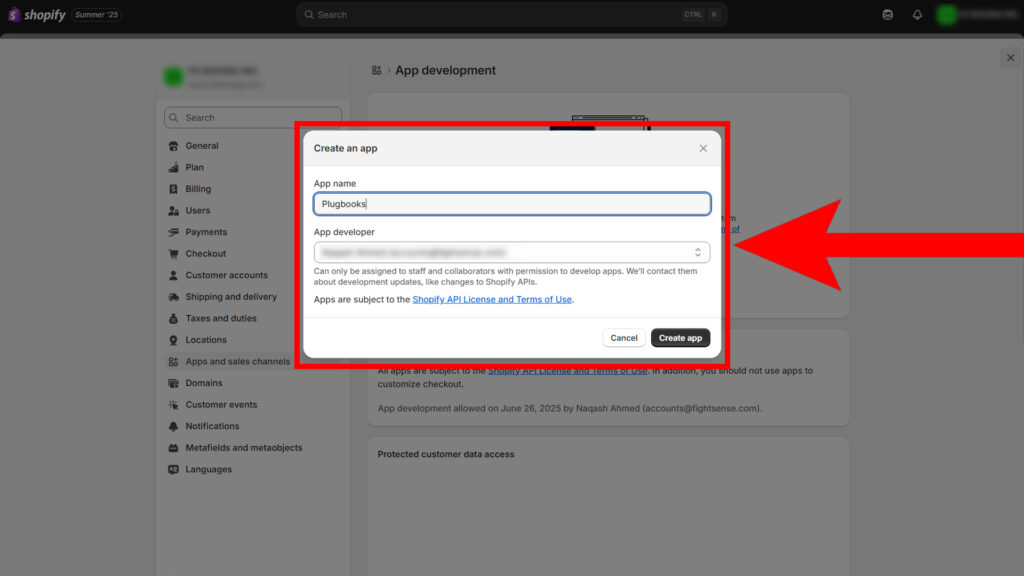
🧩 Step 3: Fill in Your App Details
You’ll be asked to enter a few basic details:
- App Name: Example: MyStore-Sync
- Description (optional): Something like Syncing store data with Plugbooks.
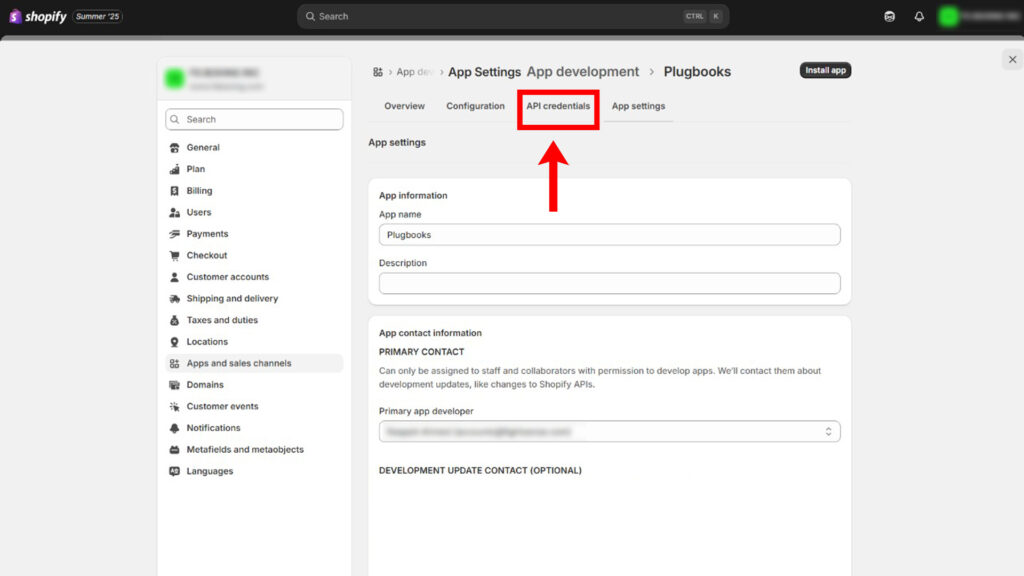
- Redirect URL: Leave this blank (for private apps).
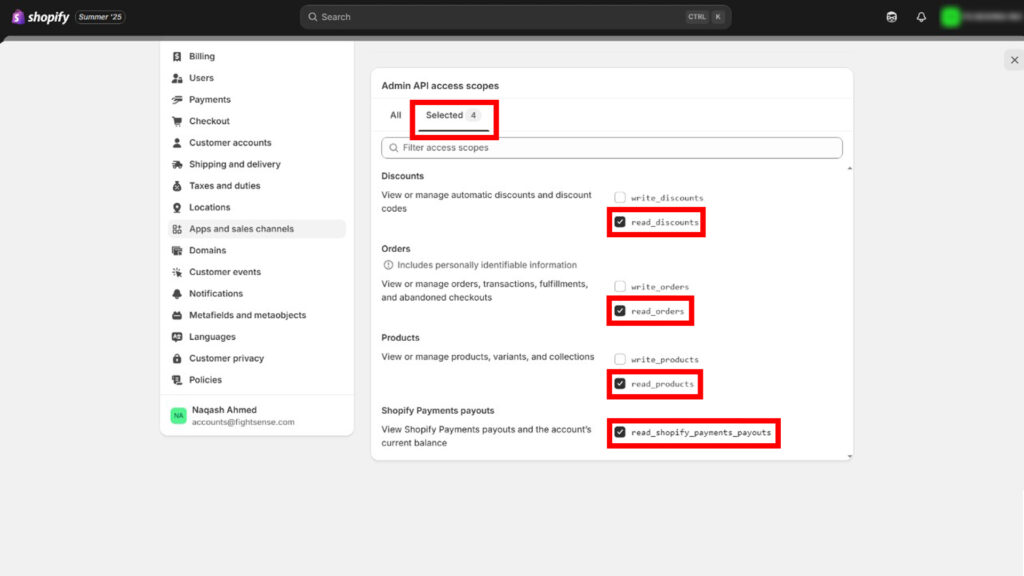
- Permissions: Select the scopes needed such as:
- Orders (read_orders)
- Products (read_products)
- Discounts (read_discounts)
- Reports (read_shopify_payments_payouts)
- Orders (read_orders)
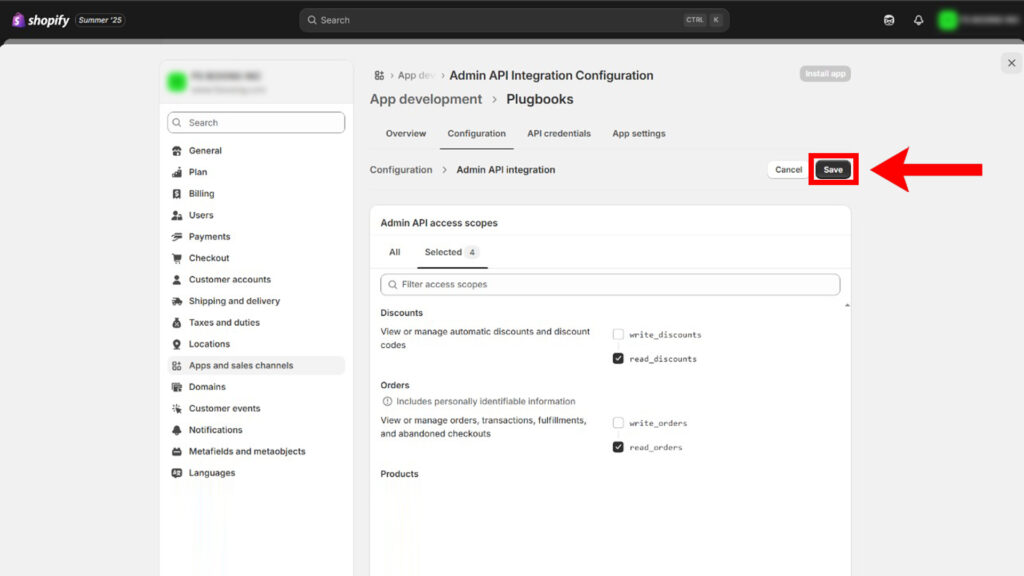
Search All these rights in Filter and select these by click on checkbox. Click Save After that you can see them in sellected tab.
✅ Plugbooks may guide you based on the platform you’re connecting.
Click Save to continue.
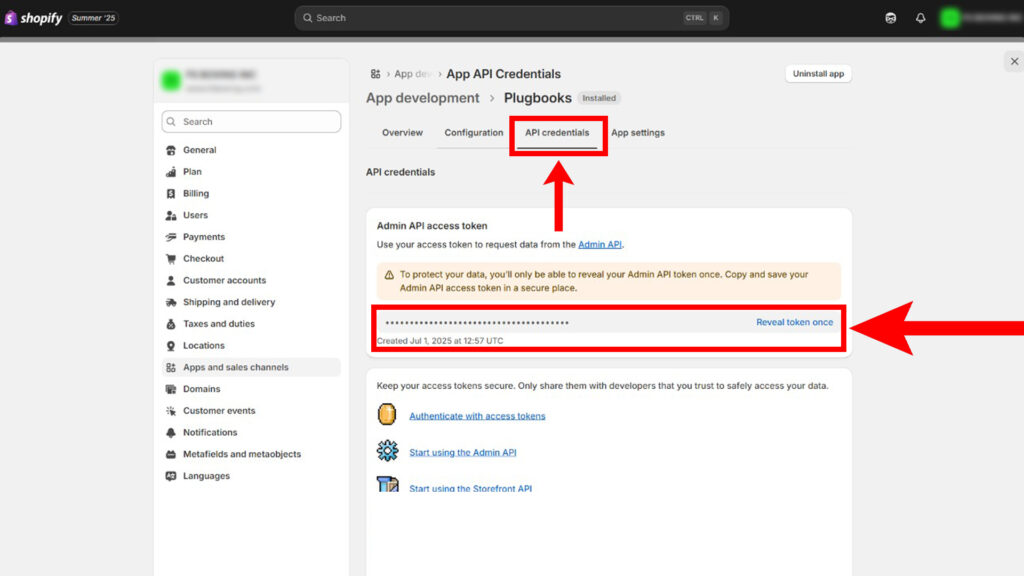
🔑 Step 4: Generate Your Access Token
Once your private app is saved:
you need to install that app after installation it will give you access token which you will provide to plugbooks to give your shopify access for bookeeping.
- Click the Reveal Access Token button.
- Copy the access token and provide it to Plugbooks.
⚠️ Keep your access token confidential—it’s like a password for your app connection.
🔁 Step 5: Connect Your Store Using the Token
With your token in hand:
- Return to the Plugbooks Integrations section.
- Choose the platform you’re syncing (Shopify, Amazon, eBay).
- Enter your access token when prompted.
Your data will begin syncing automatically—orders, payouts, products, and financials—all flowing straight into QuickBooks or Xero.
🤔 Have Questions?
If you get stuck or need clarification during any of these steps, Plugbooks has a helpful FAQs page where you can find answers to the most common questions about tokens, integrations, and syncing. It’s a great place to explore before contacting support.
🎯 Why Use a Private App for Plugbooks?
Using a private app with an access token offers:
- Greater control over your data.
- Flexible platform integration (across Amazon, eBay, and Shopify).
- Enhanced security and customization.
Whether you’re a seller, accountant, or developer, this method is fast, safe, and highly efficient.

✅ Final Recap
Here’s a quick summary of how to create a private app and get an access token for Plugbooks:
- Log in to Shopify
- Go to the Apps section
- Create your private app
- Generate the access token
- Connect your store
That’s it! You’re now ready to automate your eCommerce accounting with Plugbooks like a pro.
Need extra support?
👉 Check the Plugbooks FAQ page for detailed answers or contact support for one-on-one help.